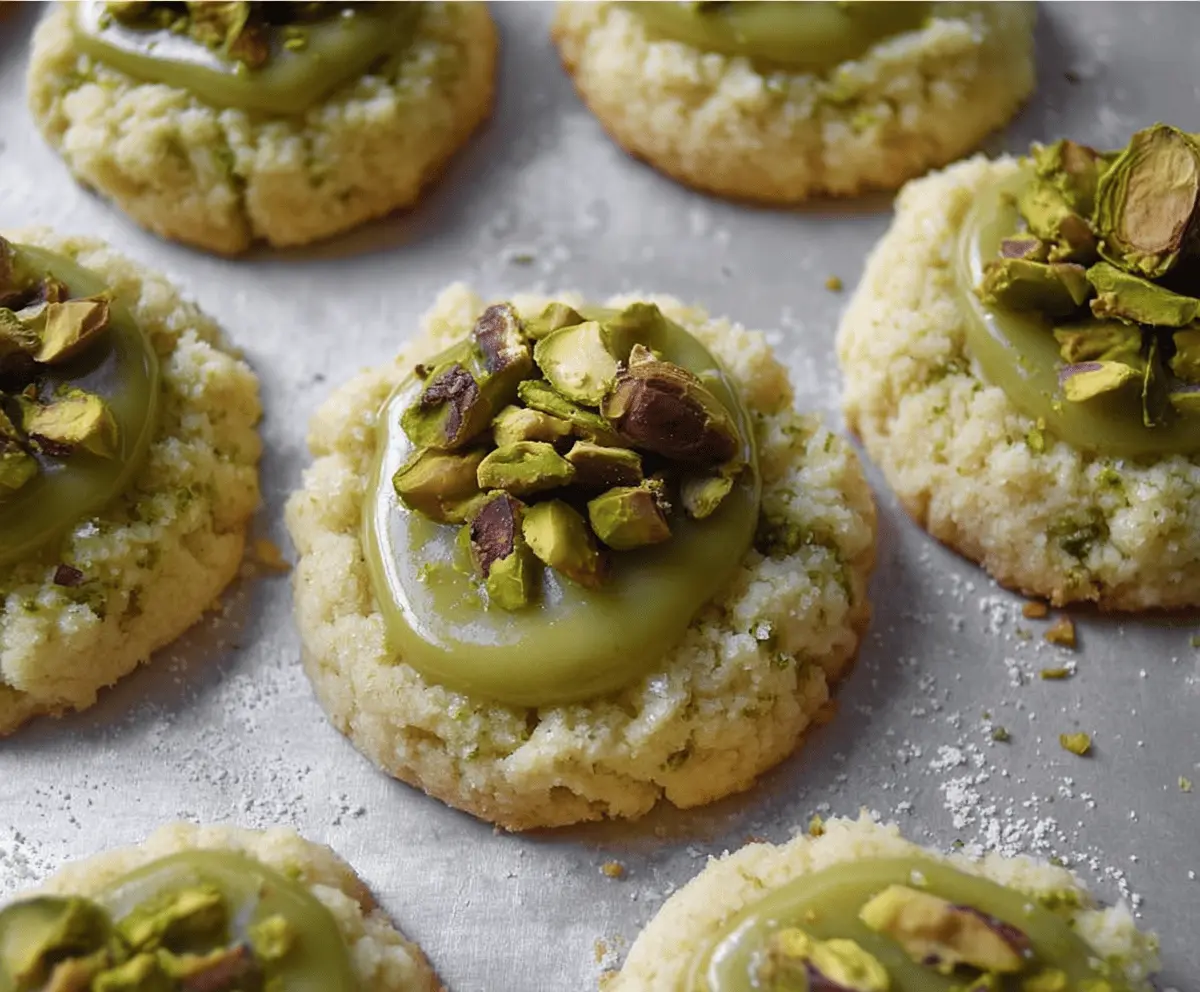
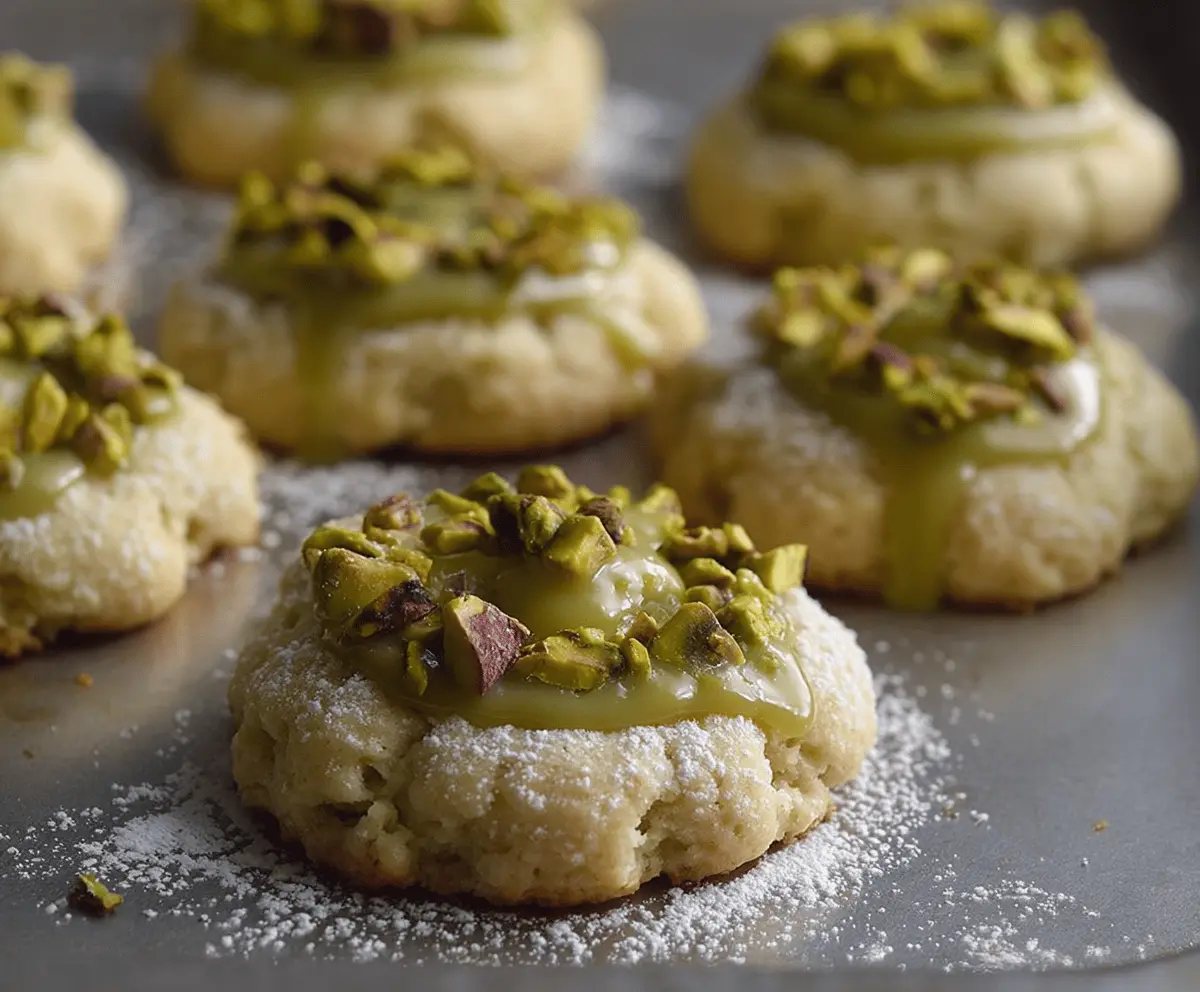
These Buttery Pistachio Thumbprint Cookies are soft, tasty bites with a lovely nutty flavor. They have a sweet jam-filled center that makes each cookie special!
Every time I bake these, the smell fills my kitchen and makes everyone happy. They’re perfect for sharing or enjoying with a cup of tea—just don’t forget to save a few for yourself! 😊
Key Ingredients & Substitutions
Unsalted Butter: This is crucial for rich flavor. If you’re dairy-free, coconut oil or a vegan butter substitute works great! Just ensure it’s softened.
Granulated Sugar: Basic, but essential for sweetness. For a healthier option, you could use coconut sugar or honey, but this might alter the cookie’s texture slightly.
Pistachio Pudding Mix: This adds a lovely pistachio flavor and helps with texture. If you can’t find it, consider using finely ground pistachios or almond flour for a nutty twist.
Sweetened Condensed Milk: It gives the filling a creamy texture. For a lighter option, you can use evaporated milk, or for dairy-free, try coconut cream sweetened with a bit of sugar.
Pistachios: Freshly chopped is ideal for crunch. If you’re nut-free, substitute with sunflower seeds or pumpkin seeds for the topping. They won’t have the same flavor but will still add texture!
How Do You Get the Perfect Thumbprint?
Creating the well in each cookie is key for holding the filling. Make sure your dough is slightly chilled so it’s manageable. Here’s how to do it:
- After rolling the dough into balls, slightly flatten them first before pressing.
- Using your thumb, press down gently. If the dough sticks, lightly flour your thumb or use a small spoon.
- Shape the well nice and deep but don’t let it go all the way through the bottom.
This step is essential for a good cookie bite that’s not too crumbly, allowing the filling to sit nicely instead of overflowing when baked. Enjoy your baking! 🍪
How to Make Buttery Pistachio Thumbprint Cookies
Ingredients You’ll Need:
For the Cookie Dough:
- 1 cup unsalted butter, softened
- 3/4 cup granulated sugar
- 1 large egg yolk
- 1 teaspoon vanilla extract
- 2 cups all-purpose flour
- 1/2 teaspoon salt
- 1/2 cup pistachio pudding mix (instant, dry)
For the Filling:
- 1/3 cup sweetened condensed milk
- 1 cup finely chopped shelled pistachios
For Garnishing:
- 1/2 cup powdered sugar (for dusting)
- 1 cup chopped pistachios (for garnish)
How Much Time Will You Need?
This cookie recipe takes about 25 minutes of prep time and an additional 15 minutes to bake. Total, you’re looking at around 40-45 minutes before you can enjoy these delicious cookies fresh from the oven!
Step-by-Step Instructions:
1. Preheat the Oven:
Start by preheating your oven to 350°F (175°C). Line a baking sheet with parchment paper or a silicone baking mat to prevent the cookies from sticking.
2. Make the Dough:
In a large mixing bowl, cream the softened butter and granulated sugar together until the mixture is light and fluffy. This will take about 2-3 minutes. Add the egg yolk and vanilla extract to the bowl, stirring until everything is nicely combined.
3. Combine Dry Ingredients:
In a separate bowl, mix together the all-purpose flour, salt, and dry pistachio pudding mix with a whisk. Slowly add the dry ingredients to the wet mixture, mixing gently until just combined. Your dough will be soft but should hold together well.
4. Shape the Cookies:
Roll the dough into 1-inch balls and place them about 2 inches apart on the prepared baking sheet. Using your thumb or the back of a small spoon, make a gentle indentation in the center of each ball to create a well for the filling.
5. Bake the Cookies:
Pop the baking sheet in the oven and bake the cookies for 12-15 minutes, or until the edges are lightly golden. Keep an eye on them to ensure they don’t overbake!
6. Prepare the Pistachio Filling:
While the cookies are baking, make the pistachio filling. In a small saucepan, combine the sweetened condensed milk and the finely chopped pistachios over low heat. Stir frequently until the mixture thickens slightly, which should take about 3-5 minutes. Remove it from the heat and let it cool a bit.
7. Fill and Garnish the Cookies:
Once the cookies are baked and cooled, fill each thumbprint well with the pistachio mixture. Don’t be shy—make sure to fill them generously! Then, sprinkle extra chopped pistachios on top for a delightful crunch.
8. Add the Finishing Touch:
Before serving, lightly dust the cookies with powdered sugar to make them look extra special!
9. Store Your Cookies:
Store any leftover cookies in an airtight container at room temperature for up to a week. Though I doubt they’ll last that long—they’re just too good!
Enjoy these buttery, soft cookies bursting with pistachio flavor and a creamy nutty center! Happy baking! 🍪
Can I Use Different Nuts in These Cookies?
Absolutely! While the pistachios give these cookies their signature flavor, you can substitute them with other nuts like almonds or walnuts. Just chop them finely to ensure they mix well into the dough and filling.
Can I Make the Dough Ahead of Time?
Yes, you can prepare the dough ahead of time! Just wrap it tightly in plastic wrap and refrigerate for up to 2 days. When you’re ready to bake, let it sit at room temperature for about 10-15 minutes to soften before rolling into balls.
How to Store Leftover Cookies?
Store any leftover cookies in an airtight container at room temperature for up to a week. If you want to keep them fresh longer, consider refrigerating them or freezing for up to 3 months. Just remember to thaw them completely before enjoying!
Can I Use a Different Filling?
Yes, you can definitely change up the filling! Try using fruit preserves, chocolate ganache, or even a cream cheese filling for a delicious variation. Just make sure whatever you choose is thick enough to hold its shape in the thumbprint!