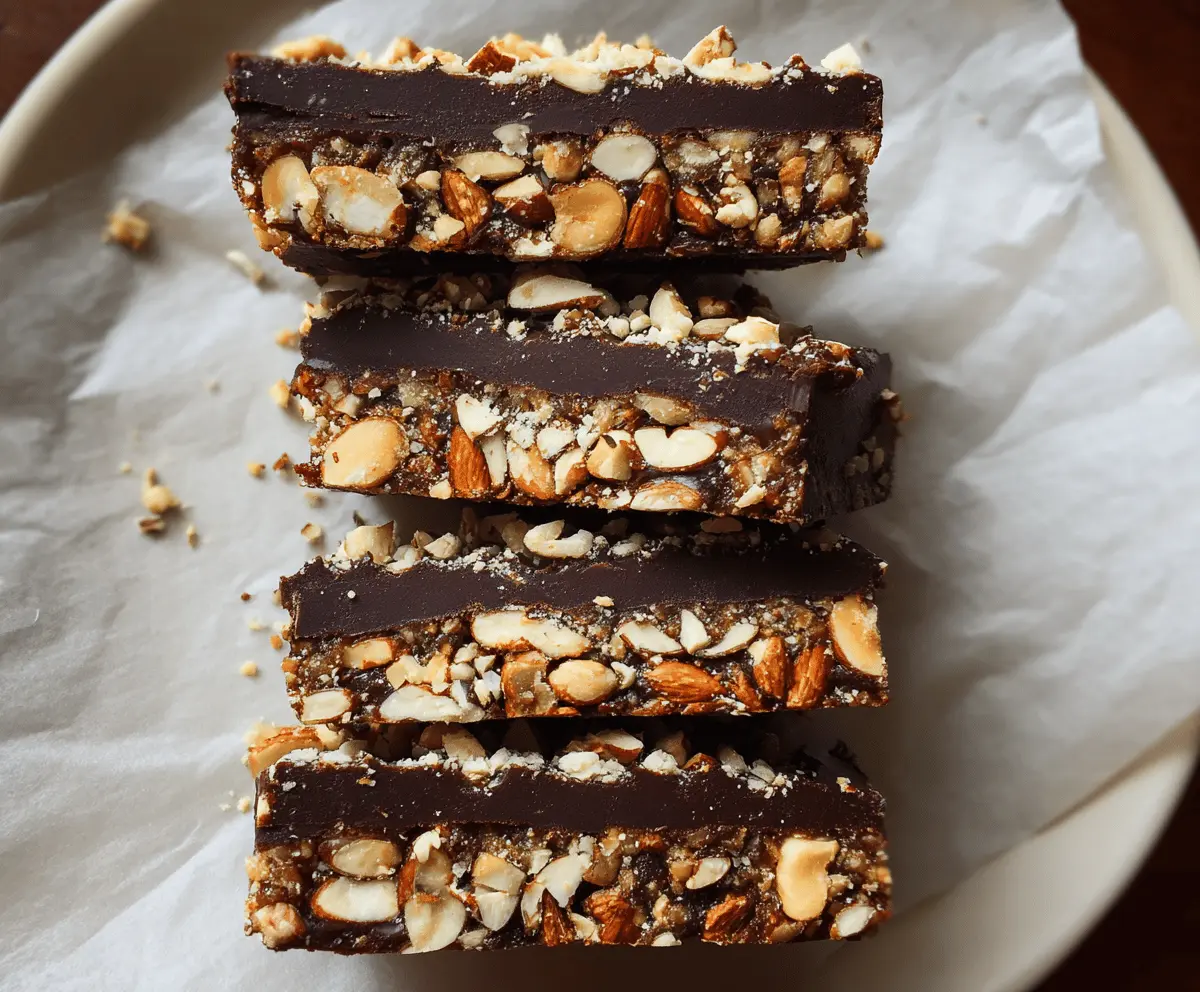
These Dark Chocolate Nut Squares are a yummy treat full of crunchy nuts and rich chocolate. They’re easy to make and perfect for satisfying your sweet tooth!
Let’s be real, who can resist the combo of chocolate and nuts? I love sharing these squares at parties. They always disappear fast, and I might sneak a few for myself! 😋
Key Ingredients & Substitutions
Mixed Nuts: I love using a mix of almonds, walnuts, and cashews for these squares. You can use your favorites or even go nut-free with seeds like sunflower or pumpkin seeds if allergies are a concern!
Rolled Oats or Puffed Rice: Rolled oats give a nice texture. If you want something lighter, puffed rice adds a fun crunch! Both choices work great. Even gluten-free oats are an option!
Butter: Unsalted butter adds richness, but you can substitute coconut oil for a dairy-free option. It’ll change the flavor slightly but still taste delicious!
Dark Chocolate: I recommend 70% cocoa for a rich taste. If you’re a milk chocolate fan, feel free to swap it; just note that it might be sweeter. Chocolate chips are easier to melt—just choose good quality!
How Do I Make Sure My Squares Hold Together Properly?
To achieve that perfect bar shape, it’s crucial to press the mixture tightly into the pan. This step can’t be skipped! Here’s how:
- Use the back of a spatula or a clean piece of parchment paper to press down. Don’t be shy—really pack it tight!
- Let the mixture cool before you add the chocolate. If it’s hot, the chocolate might melt away when you pour it on top.
- Ensure your bars chill in the fridge for a solid two hours. This will set the chocolate and help the bars hold up nicely when you cut them.
Trust me, following these tips will help you achieve perfect Dark Chocolate Nut Squares every time!
How to Make Dark Chocolate Nut Squares
Ingredients You’ll Need:
For the Base:
- 1 cup mixed nuts (such as almonds, walnuts, cashews), roughly chopped
- 1 cup rolled oats or puffed rice
- 1/2 cup unsalted butter
- 1/2 cup brown sugar, packed
- 1/4 cup honey or corn syrup
- 1/4 teaspoon salt
- 1 teaspoon vanilla extract
For the Topping:
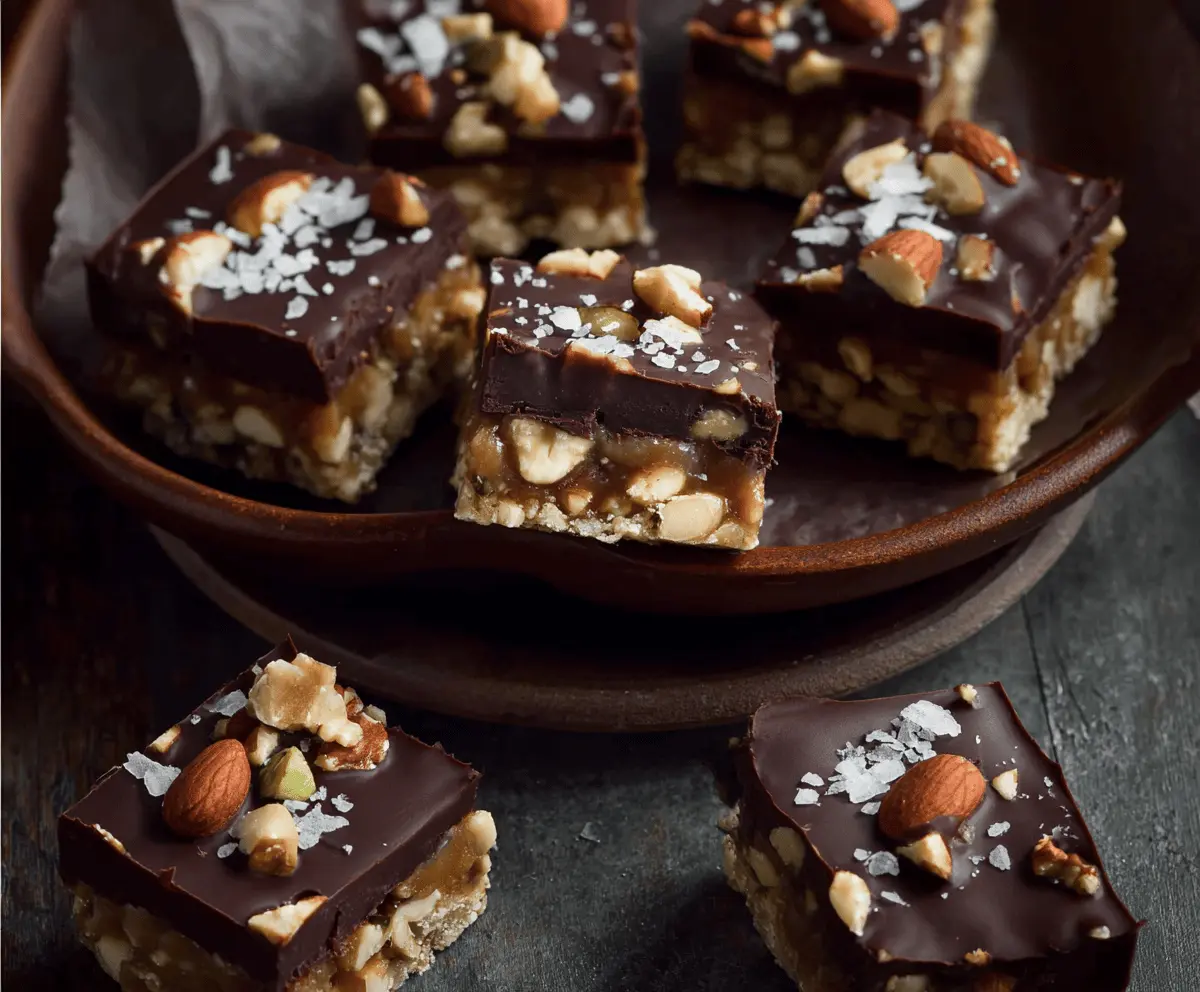
- 8 ounces dark chocolate (70% cocoa recommended), chopped or in chips
- Flaky sea salt, for sprinkling on top
How Much Time Will You Need?
This recipe requires roughly 15 minutes for prep and about 2 hours of chilling time in the refrigerator. You’ll mix it up quickly, then let it set, making it a perfect treat to prepare ahead of time!
Step-by-Step Instructions:
1. Prepare Your Baking Pan:
Start by lining an 8×8-inch square baking pan with parchment paper, leaving some overhang at the edges. This will help you lift the bars out easily once they are set. Now you’re ready to mix all those delicious ingredients!
2. Mix the Base Ingredients:
In a large mixing bowl, combine the chopped mixed nuts and rolled oats (or puffed rice). Give them a good stir to make sure everything is mixed. This will form the crunchy base of your squares.
3. Make the Sweet Mixture:
Now, take a medium saucepan and melt the butter over medium heat. Once melted, add the brown sugar, honey (or corn syrup), and salt. Stir continuously and let the mixture come to a gentle boil. Keep stirring for 1-2 minutes—this helps to blend all those flavors together!
4. Combine Everything:
After boiling, remove the saucepan from heat and stir in the vanilla extract. This is where the magic happens! Quickly pour the hot mixture over the nut and oat blend. Mix it up until everything is coated evenly. Yum!
5. Form the Base:
Now it’s time to pack it all together! Press the mixture firmly into the prepared baking pan. Use the back of a spatula or a clean piece of parchment paper to help pack it down tightly. This will create a solid base for your squares.
6. Melt the Chocolate:
In a microwave-safe bowl, melt the dark chocolate in 30-second intervals, stirring in between until it’s smooth and melted. If you prefer, you can also use a double boiler for this step. Once melted, it’s time for the fun part!
7. Add the Chocolate Topping:
Pour the melted chocolate over the pressed nut layer in the pan. Use a spatula to spread it evenly, covering all the crunchy goodness below.
8. Finish with Sea Salt:
While the chocolate is still soft, sprinkle some flaky sea salt on top, along with a few extra chopped nuts or whole almonds for decoration. This touch adds a nice flavor contrast!
9. Chill and Set:
Cover the pan with plastic wrap or foil and refrigerate for at least 2 hours, or until the chocolate is firm and the bars are set. Patience is key here!
10. Cut and Enjoy:
Once set, lift the block out of the pan using the parchment paper overhang and cut into squares with a sharp knife. Enjoy these delightful treats!
11. Storage:
Store any leftovers in an airtight container in the refrigerator for up to one week, though I doubt they’ll last that long!
These Dark Chocolate Nut Squares are your go-to treat for a crunchy, rich, and slightly salty snack. Perfect for sharing or enjoying all by yourself; they won’t disappoint!
Can I Use Different Nuts or Seeds?
Absolutely! Feel free to swap out the mixed nuts for your favorites or go nut-free by using seeds like sunflower or pumpkin seeds. Just keep the measurements the same for a similar texture!
How Do I Melt Chocolate Without Burning It?
To melt chocolate safely, use a microwave-safe bowl and heat it in 30-second intervals, stirring in between. Alternatively, you can melt it using a double boiler. Both methods help prevent burning!
How to Store Leftover Bars?
Store your Dark Chocolate Nut Squares in an airtight container in the refrigerator for up to one week. If you want them to last longer, you can freeze them for up to three months. Just make sure they’re well-wrapped!
Can I Make These Squares Vegan?
Yes, you can easily make this recipe vegan! Substitute the unsalted butter with coconut oil or vegan butter, and swap the honey for maple syrup or agave nectar.