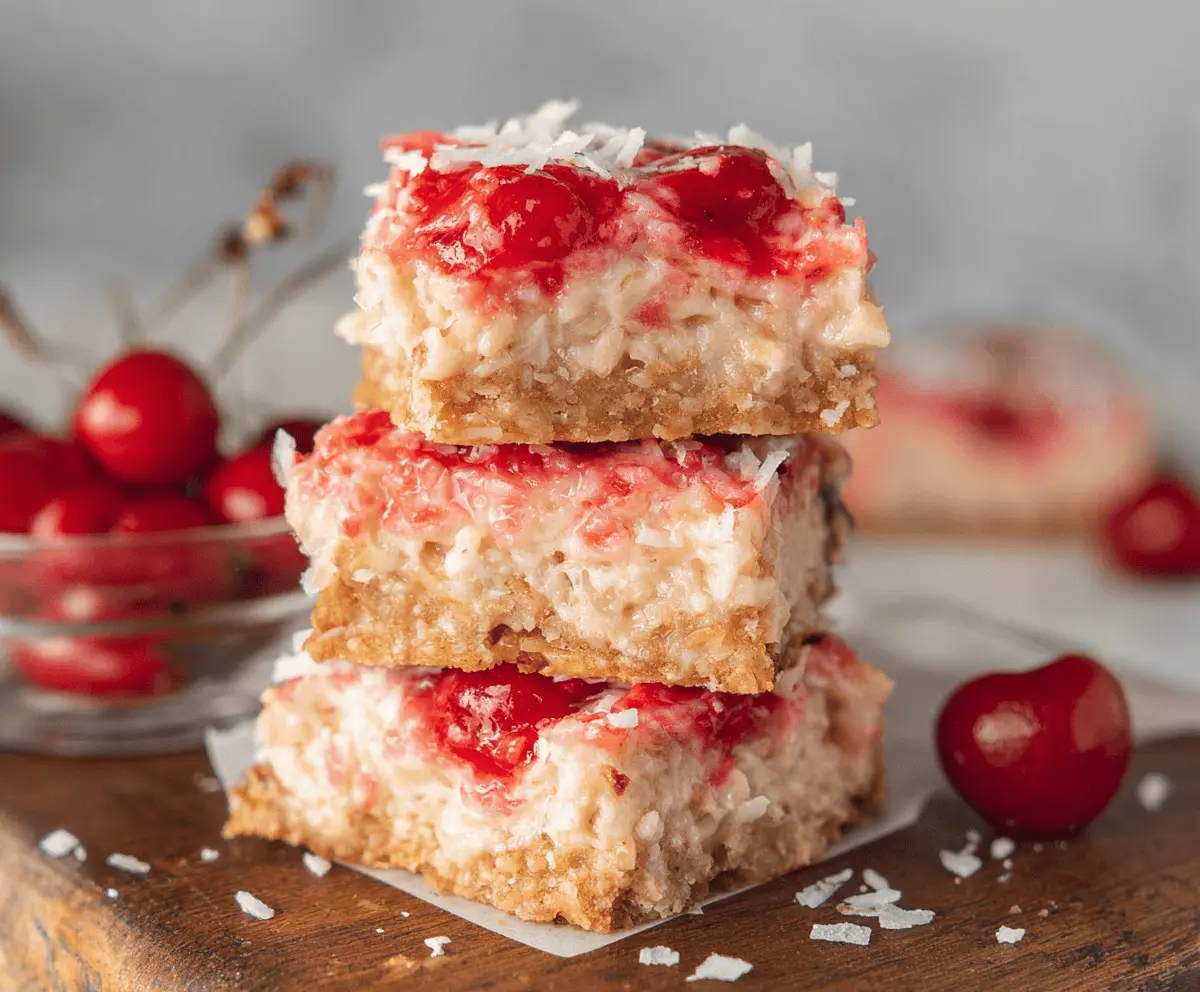
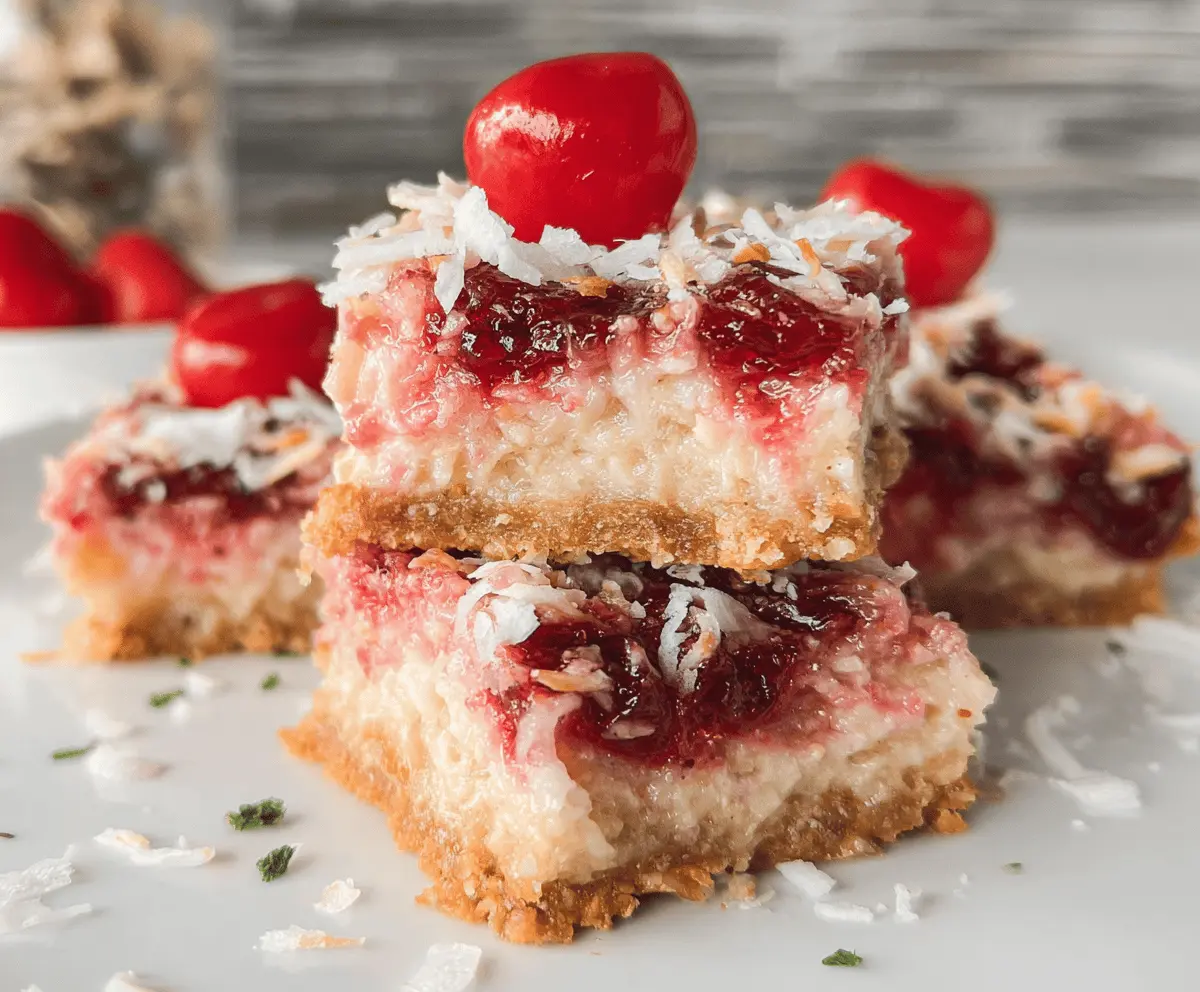
These Easy Cherry Coconut Bars are a delightful treat that brings together sweet cherries and crunchy coconut. They are chewy, fruity, and super fun to make!
When I whip these up, I can’t resist the yummy smell of cherries baking. Just a heads up, they disappear quickly at parties! 🍒🥥
I love serving them warm with a scoop of ice cream. It’s a simple dessert that always gets smiles! So, are you ready to bake some happy?
Key Ingredients & Substitutions
All-Purpose Flour: This flour acts as the base for the bars. If you’re gluten-sensitive, you can use gluten-free all-purpose flour as a substitute without losing too much texture.
Granulated Sugar: Regular sugar gives sweetness and helps with texture. If you’re looking for a healthier option, coconut sugar or maple syrup can work, but adjust the liquids in the recipe if you swap to syrup.
Shredded Sweetened Coconut: Sweetened coconut gives a lovely texture. Unsweetened coconut can be used if you prefer less sweetness; just add a little more sugar to balance it out.
Chopped Walnuts: These add a nice crunch. If you have nut allergies, feel free to skip them or replace them with seeds like sunflower or pumpkin seeds for added texture.
Butter: This is essential for moisture. If you need a dairy-free option, coconut oil or a vegan butter substitute can be used just as effectively.
Cherry Pie Filling: You can use homemade cherry filling, fresh cherries cooked down with a bit of sugar, or even another fruit filling like raspberry or blueberry as a fun twist!
How Do I Get the Perfect Crust for My Cherry Coconut Bars?
Creating that perfect crust is key to any good bar recipe. You’ll want it to be sturdy yet tender. Here’s how to nail it:
- Make sure to press the crumb mixture firmly into the pan. This helps it hold together after baking.
- Don’t skip the cooling step. Letting it cool completely before cutting ensures clean bars that don’t crumble apart.
- If the crust looks a little too crumbly, a tiny bit of water can be added to the mixture to help it stick together better.
These steps will make sure you get that delightful, crumbly base that holds beautifully under the cherry filling. Happy baking!
Easy Cherry Coconut Bars
Ingredients You’ll Need:
For the Bars:
- 1 cup all-purpose flour
- 1 cup granulated sugar
- 3/4 cup shredded sweetened coconut
- 1/2 cup chopped walnuts (optional)
- 1/2 cup butter, melted
- 1 jar (about 10-12 oz) cherry pie filling
How Much Time Will You Need?
This recipe will take about 10 minutes to prepare and 35-40 minutes to bake. After baking, let the bars cool completely before cutting, which will take roughly another 30 minutes. So, in total, you’re looking at about 1 hour and 20 minutes from start to finish before you can enjoy these tasty treats!
Step-by-Step Instructions:
1. Preheat the Oven:
Start by preheating your oven to 350°F (175°C). This is important so that your bars bake evenly. While your oven is heating, you can prepare your baking pan. Grease it lightly or line it with parchment paper to make removing the bars easier later on.
2. Mix the Ingredients:
In a medium bowl, toss together your flour, granulated sugar, shredded coconut, and chopped walnuts (if you’re using them). Then, pour in the melted butter. Mix everything with a spoon or spatula until it looks crumbly but still holds together when you squeeze a handful. This mixture is going to create both the base and the topping for your bars!
3. Form the Base:
Take half of the crumb mixture and press it firmly into the bottom of your prepared baking pan. You want it to be even and packed down so that it holds the cherry filling nicely. It doesn’t have to be perfect, just make sure it covers the base well.
4. Add the Cherry Filling:
Now it’s time to spread that yummy cherry pie filling! Spoon it evenly over the crust layer you just made. Make sure to cover it all the way to the edges so every bite is filled with delicious cherry goodness.
5. Top with Remaining Crumbs:
Sprinkle the rest of your crumb mixture evenly over the cherry filling. Gently press it down a little to help hold it all together while baking.
6. Bake:
Place the pan in the preheated oven and bake the bars for 35-40 minutes. You’ll know they’re ready when the top is golden brown and the cherry filling is bubbling. Don’t walk away just yet; keep an eye on them so they don’t overbake!
7. Cool and Cut:
Once they are done baking, take the pan out of the oven and let it cool completely on a wire rack. This cooling step is essential for achieving the best texture when cutting. It should take about 30 minutes.
8. Serve and Enjoy!
After cooling, it’s time to slice them into bars! Use a sharp knife and cut evenly. These cherry coconut bars are perfect for sharing, so enjoy them with friends or keep them all to yourself!
These bars combine a crisp coconut crust with a luscious cherry filling—perfect for a quick dessert or snack. They’re sure to brighten your day!
FAQ for Easy Cherry Coconut Bars
Can I Use Fresh Cherries Instead of Cherry Pie Filling?
Absolutely! You can use fresh cherries by pitting and cutting them in half, then cooking them down with a bit of sugar and cornstarch until they thicken. This will give you a fresh cherry filling that’s just as delicious!
How Should I Store Leftover Bars?
Store any leftovers in an airtight container at room temperature for up to 3 days. If you want them to last longer, you can refrigerate them for up to a week, or freeze them for up to 2 months. Just make sure to wrap them well before freezing!
Can I Make These Bars Gluten-Free?
Yes, you can substitute the all-purpose flour with a 1:1 gluten-free baking flour blend. Just make sure that the blend you use works well for baking to achieve the right texture.
What Can I Substitute for Butter?
If you need a dairy-free option, coconut oil or vegan butter can be swapped in for the melted butter. Just ensure they are melted before adding to the dry ingredients for the best consistency!